
Equip your little pirates with some swashbuckling swag for a rainy afternoon of play. You can make your own DIY telescope and an eye patch or turn telescope making into a game in itself with this simple and super fun cardboard tubes craft. Read on to find out how to make a telescope and a pirate eye patch with everyday supplies you’ll find in your own home.
Tip
If you are getting the children involved and showing them how to build a telescope, be sure to fully supervise them. For their safety, only adults should handle scissors and pins during the process of telescope making.
Pirate telescope craft equipment
Before you dive into the pirate world and build your own telescope, there are a few pieces of equipment you will need for the project. Here’s what you need so you can build a telescope:
- 2 empty tubes of Plenty The Big Extra One (they’re longer than other Plenty paper towels so they’re perfectly suited for telescope making)
- Scissors
- Gummed paper tape
- Paint
- Craft varnish paint (optional)
- Paintbrush
- A stapler
- A length of string (cotton thread or fine twine), around 40cm
- Sticky tape
- Glue
- Plenty paper towels
Now you have everything together that you need, read on for our simple guide to make your own telescope.
How to make a telescope – let's build a spyglass, pirate!

Every good pirate knows how important a telescope – or spyglass, as they would have called them – is. It is used to spot, ‘land ho!’ and magnify far away objects while on board your pirate ship. To help your children with their imaginative, indoor play, read on for one of our favourite DIY crafts for kids and this 13 easy step-by-step guide for how to make your own DIY telescope:
-

-

-

-

- Repeat step 4 on the other end of tube B, so that the piece is stapled at both ends.
-

-

-

-

-

-

-


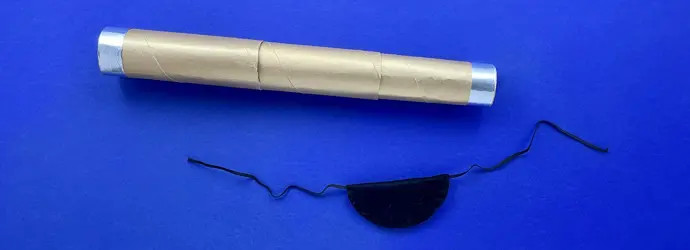
How easy is that? A bit of recycling and upcycling can lead to a whole lot of fun. Now that your homemade telescope building is done, the pirates are nearly ready for their voyage. To add to this pirate telescope craft session, next, get them kitted out with a swashbuckling eye patch.
Tip
Keep Plenty The Big Extra One paper towels on hand to wipe up any little paint spills, as well as to dampen the gummed paper. It’s strong even when wet, so you can reuse the same sheet.
Pirate eye patch equipment
Eye patches are a classic part of any pirate dressing up outfit, and an obvious addition to your pirate telescope craft session. Here’s what you’ll need after you finish homemade telescope building:
- A piece of black fabric or felt, big enough to cut a circle about 9cm in diameter
- A sauce jar lid or similar to trace your circle
- A pencil
- A thin black elastic thread
- A needle with black thread
- Dressmaking pins
- Scissors
How to make a pirate eye patch
Once you have all the tools you need, it’s time to get your DIY on. Here are three super easy tips to create your own homemade pirate eye patch to wear while playing with your DIY telescope:
-

-

-

-


You’re all done with our telescope craft: a DIY telescope and an easy pirate eye patch. Now you can make a telescope, it’s time to take to the high seas! In just a handful of easy steps you’ll have your little pirates kitted out for a day of swashbuckling indoor play in no time.
On the lookout for more easy and fun paper crafts? Check out our article for loads of great ideas! Here’s to smooth sailing.
Did you find this article helpful?Thanks for your feedback!
or
Do you have a question on this topic? Contact us
Related articles
2 easy ways to make homemade musical instruments for kids
Looking for easy ways to have fun with your kids while teaching them how to recycle? Learn how to make musical instruments from waste material.

Why is my cat being sick? Symptoms, causes, and solutions
“Why is my cat sick?” Learn about the signs of illness in cats, the reasons why your feline friend might be sick, and how to treat a sick cat at home.

How to save money at home: simple saving tips and budgeting tips
Looking for simple ways to save money at home? Follow our budgeting tips and saving ideas to help you save money and provide more for your loved ones!

How to speed up composting: 10 hacks to accelerate your compost
Are you looking for ways to speed up your compost? Discover how to accelerate compost with our 10 hacks. Accelerating your compost has never been easier!

What to do with leftover food: creative ways to use food leftovers
From leftover chicken ideas, to what to do with leftover rice, find out how to get the most from your food leftovers.

Shortage of water: what is water stress and what can we do about it?
What is water stress, and what can we do to reduce its impact? Learn about water stress, its definition, causes, effects, and how to help water scarcity.
