5 people found this helpful

Ever grab something from a shelf and notice it’s feeling a bit furrier than usual? Or have you seen something your partner used to use that’s now so covered in dust that you could write your name in it with your finger? Well, handily, dusting is an act of love for everyone in your home.
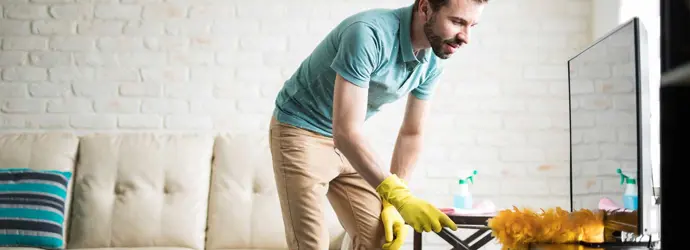
So, here’s exactly how to dust all those tricky, hard-to-reach corners with confidence. We’ll also share some of our clever dust-free cleaning hacks, making it easy to get rid of dust from every surface in your home and leave your space sparkling.
In this guide, we’ll cover:
- How often should you dust
- How to keep your home dust-free
- Frequently asked questions
How often should you dust?
Before we get into our top dusting tips, let’s answer the question on everyone’s lips: how often should you dust your home? The main thing to consider is whether or not you have someone in your home with allergies or a breathing condition. If you do, you’ll need to make a little more of an effort to keep your home dust free – wiping surfaces at least every week.1
If you don’t have any sufferers, you’ll still need to be cleaning dust every couple of weeks from your TV or any electronics, your furniture, and any other place it seems to appear. But you could be more flexible and leave other areas for up to a month, depending on how much it bothers you.
How to keep your home dust-free
Wondering how to get rid of dust in your house? Rather than charging in without a plan, we’ve put together 3 simple steps to help you get rid of dust. Follow these easy tips on how to dust your home and you’ll soon wave goodbye to dusty corners and clouds for good.
1. Get your kit ready before you start cleaning dust
If you’re thinking about how to properly dust your home, the best way to start is to get together everything you might need before starting.
What you’ll need:
- A microfibre cloth
- Furniture polish
- A vacuum cleaner (preferably, with a brush attachment)
- A broom or mop with a microfibre cloth (ideal for dusting walls and high areas)
Tip
Plenty Max Household Towels are another great addition to your easy dusting kit – they’re strong when wet and ideal for picking up dust in hard-to-reach dusty corners.
2. Cleaning dust the right way
If you want to remove dust properly, there are several simple tricks to eliminate dust in your house that make a real difference when used together:
- Work from top to bottom: Working from top to bottom means you’ll always be knocking dust onto surfaces below, which you can tackle once higher areas are done. This prevents you from re-dusting the same spots twice and makes the whole process more efficient.
- Move around the room systematically: To be super-efficient, the best way to dust is to focus on one section of the room at a time. Start in the corners of the ceiling and work your way down to shelves, furniture, and finally the baseboards before moving on to the next area.
- Trap dust using microfiber cloths or damp dusting: Microfiber cloths are designed to trap dust rather than push it around. Use them dry for light dust, or lightly dampen with warm water for heavier build-up to stop dust from becoming airborne.
- Use proper filtration when vacuuming: Vacuuming with a high-quality filter, such as a HEPA filter, helps capture fine dust particles instead of releasing them back into the air.1
- Declutter to reduce dust build-up: The more items you have on display, the more surfaces dust can settle on. Keeping shelves, side tables, and surfaces clutter-free makes dusting quicker and helps prevent dust from building up in the first place.
- Stop dust from entering your home: Use doormats to trap dirt, avoid wearing shoes indoors, and groom pets regularly to limit how much dust and debris is brought inside.
3. Dust-free cleaning hacks: tackling dust in forgotten areas
If you’re going to do something, you might as well do it properly! Mastering how to clean dust properly means not only dealing with the obvious spots, but also tackling those hidden corners and unexpected places where dust loves to settle (and don’t worry, we've all missed a few). Here are some commonly overlooked areas that everyone forgets:
- Walls. Dust builds up on walls more than you might think, especially near ceilings, vents, and behind furniture. A vacuum with a brush attachment or a microfiber mop works best here.
- Shelves. When you’re working top to bottom, clear anything on your shelves and give them a good dusting too.
- Picture frames. Get rid of dust not just from the top of your frame but on the sides and front too – can’t have your favourite group photos being clouded with dust!
- Behind appliances. Yep, here too. If only dust particles weren’t so small and able to get everywhere.
- Vents and fans. While you can use your duster to get into your vent or fan, the soft brush attachment (oh, that’s what it’s used for) on your vacuum cleaner will probably do a better job
- Under beds. We know we’re asking you to look at your bed without jumping into it, but it’s worth pulling your bed out and giving it a good vacuum and wipe around skirting boards every now and then.
- On beds. To those who haaate doing laundry, you might not like this one. Dust mites love bedding, so getting into the habit of regularly washing your sheets, pillows, and duvet covers can keep them away.
FAQs: Dusting tips
Why is it important to regularly get rid of dust in the home?
Dusting isn’t just about keeping things looking nice. Household dust can quietly collect allergens, irritants and even tiny dust mites that affect indoor air quality over time. This build-up can aggravate airways and make your home feel less comfortable, even if no one has allergies.2 Regular dusting helps reduce this build-up, creating a fresher, healthier living space for everyone.
What are some of the best ways to reduce dust in the home?
Reducing dust is all about working smarter, not harder. A regular cleaning routine goes a long way - wiping surfaces with a microfibre cloth, vacuuming floors, and washing bedding helps stop dust from settling in. It also helps to be mindful of clutter; fewer knick-knacks and piles mean fewer places for dust to hide. With a few simple habits, you can keep dust under control and your home feeling lighter, cleaner and more welcoming.
There you have it, our top dusting tips. And remember, you’re never going to get every speck of dust, and that’s ok. Even making the effort itself will make your loved ones feel a little bit more loved. We’d say they might even try to make less dust, but we don’t think that’s even possible…
Did you find this article helpful?Thanks for your feedback!
or
Do you have a question on this topic? Contact us
Related articles
Easy tips for removing chewing gum from carpet and sofas
Removing chewing gum from carpets or upholstery is easy once you know what to do. View our simple guide on how to get gum out of a carpet or sofa.

How to clean (really) dirty wooden furniture
Want to know how to clean grime off wood furniture without chemicals? Here are three ways to clean a wooden table using things you already have at home.

6 natural cleaning products to use at home
Click to find out how to make natural cleaning products and natural disinfectant solutions for the home – and how to use them effectively.

Spilt milk on the carpet? Here’s how to clean milk off carpets
Spilt milk on carpet areas? Read on for our easy to follow four-step guide on how to get milk out of the carpet.

How to remove ink stains on wood, plastic, floors & walls
Find out how to remove ink stain marks from a number of different surfaces. Discover pen stain removal techniques for wood, floors and walls.

5 house cleaning tips and printable house cleaning schedule
From unexpected visitors, to parties you forgot you’d planned, learn how to clean your house fast with our 5 house cleaning tips and house cleaning checklist.
