There are so many home DIY projects you can sink your teeth into (and cover your house in dust with), from big to small – the kitchen extension you’ve always wanted, or a little bird house for your garden. For now, we’re going to focus on three easy DIY projects for home that are easy to clear up, too. Result.
Although they may well be simple home improvements, you’ll love being able to do them and you’ll enjoy the results. So grab your drill and get ready to DIY like a master…
Easy DIY projects #1 – Putting up shelves
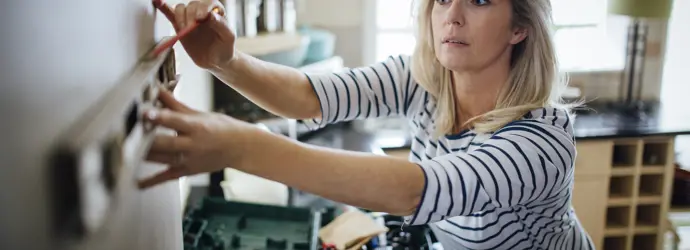
Hanging a few shelves on the wall is one of those simple home DIY projects that can have a huge impact, both practically and visually. They’re a new space for you to store items or display ornaments and artwork. Yep, that ‘interesting’ knick-knack from your Great Aunt Gilda will finally have a home.
What you’ll need
- A drill, plus a pencil and tape measure for marking the drilling holes (To really look the part, balance the pencil on your ear, just like the pros.)
- Pre-cut wood for the shelving (or some wood and a saw, if you fancy pushing your skills even further)
- Wall brackets, wall plugs, and the right screws
- Spirit level, so things don’t slide off your shelves when they’re done
- It’s always good to have someone with you, even with easy home improvements, to hold the shelving so you can check alignment, or to get you a plaster when you scratch yourself!
- Dustsheets – always cover nearby furniture and furnishings when tackling home DIY projects that involve drilling, as it’ll likely cause a little dust.
And remember – don’t drill holes near electrical sockets or wiring! If you’re unsure use a detector, call an expert or just put the shelves somewhere that you know is safe.
Tip
Plenty kitchen paper is the ideal companion for simple home DIY projects. It’s super-strong, absorbent and versatile – great for a whole range of tasks, including wiping down dust from drilling. A little dust is a small price to pay for the pride you’ll feel doing the job yourself.
How to do it:
- Identify where you want your shelves to sit on the wall and mark the place where you want to drill your holes.
- Do a dry fit – i.e. get someone to hold the shelves in place to see if you’re happy.
- Happy? Right, time to get the drill out. Start slow and be careful to make sure you hit the markings accurately.
- Push the wall plugs into the holes so that the screws get a good fix.
- Attach the brackets to your walls and then add the shelves.
- Grab a well-deserved brew, stand back and admire your handiwork.
Easy DIY projects for home #2 – Changing handles on drawer fronts
This is one of the easiest of easy home DIYs, but that doesn’t mean the impact can’t be fantastic. With the simple addition of a stylish handle you can take an old and dull cabinet to modern and interesting.
What you’ll need
- The new handles
- A hand screwdriver and or/a small spanner to loosen a nut (This is a gentle task, so no need for the electric version)
- Screw, nut and washer for each handle, if you don’t already have them
How to do it:
- Start off by gently removing the old handle. Patience is key here – as it is with so many easy home DIYs – especially if you’re dealing with an old cabinet.
- Once you’ve got the handle off you can repurpose the fittings, if they’re suitable, or just set them aside.
- Take your new handle and secure it with fittings. If you need to use a washer, make sure it goes on the inside of the drawer so you get a flush finish outside.
- Again, be patient and gentle. There’s a temptation to add pressure to get a really tight fit, but you shouldn’t need to overdo it. Less is more.
- Give your new handles a wipe over and a final buff – that kitchen paper will come in handy again.
Easy DIY projects #3 – Creating an indoor plant pot
Time for some more upcycling with simple home improvements. Taking something old, freshening it up and using it to grow new life in. Magical!
What you’ll need
- An old planter or pot (from the garden is fine) – whatever you think is the right size for your new pot
- Soap, water and a brush
- Your paint of choice
- Stencils (or make your own out of paper)
- A dustsheet or similar covering for the floor or table. Make clean-up time easy for yourself
- A roll of Plenty kitchen paper
How to do it:
- First up, you need to clean the pot. Shift grime, dirt and gunge by wiping inside and out with strong Plenty kitchen paper, then scrub with warm soapy water.
- Leave to dry – this bit’s really important, as is the cleaning. Grab yourself a cuppa while you wait.
- Once you’re happy that your pot is clean and dry enough you can work some magic.
- Get your paints out and go wild. Use pre-made stencils or use your own to create funky patterns. The paint should go on easily due to the work you’ve done prepping the pot.
- Let the paint dry, and then add everything you need for successful planting. Soil, plus seeds or a plant, and plenty of love!
That’s three easy home improvements that can have a big impact on your home. Be organised, creative and have fun – you’ve got this!
Did you find this article helpful?Thanks for your feedback!
or
Do you have a question on this topic? Contact us
Related articles
5 top tips for houseplant care
Not sure how often you should water plants or where to put them? Click here for houseplant care tips to help you grow your indoor jungle.

How to declutter your house – and keep it that way
Need a clear environment, but can’t face the task of house decluttering? Read our handy decluttering tips to make your home an oasis of calm.

4 tips to organise chores for kids with printable chore chart
Getting the kids involved in the chores will help make your life so much easier. Use our printable kids’ chore chart and chore ideas to get organised today.

2 totally unique homemade bunting ideas
Who needs shop-bought bunting when you can make beautiful DIY bunting? Discover our easy-to-follow step-by-step bunting ideas and to learn how to make bunting.

2 DIY garden party decorations
You’ll love our step-by-step DIY garden decoration tutorials. Discover how to make two DIY garden ornaments here!

Happy Xmess: DIY Christmas decoration ideas with Plenty kitchen paper
The most wonderful time of the year is upon us! Find out how to create ‘tree-mendous’ DIY Christmas decorations using Plenty kitchen paper here.
