238 people found this helpful
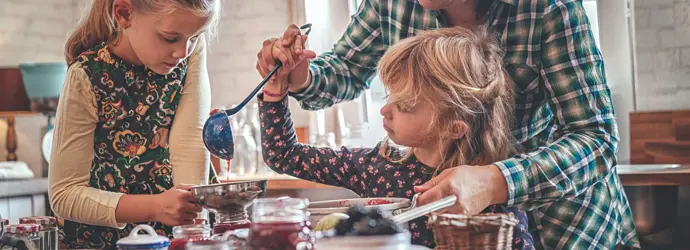
Blueberry, strawberry, blackcurrant – making homemade jam is a delightful pastime, and the results are even sweeter when done right. The last thing you want is mould spoiling your efforts, so before you start, one of the first things you need to know is how to sterilise jars. Sterilising jars keeps bacteria out of your jam, helping it stay fresh for up to a year (or sometimes longer!) – perfect for family picnics or giving as thoughtful homemade gifts.
So, let’s learn how to prevent mould on jam by sterilising jam jars. Pick your favourite of these three approaches to sterilising jars for jam making and you can swiftly move onto the fun part!
Why sterilising jam jars is essential
First things first, why do we need to know how to sterilise jam jars properly? Well, there are two reasons. One is to do with health. If you don’t take the time to carry out this important step, you increase the risk of bacteria breeding in the jar and producing toxins that can cause dangerous conditions like botulism.1 So that’s why learning how to prevent mould on homemade jam by sterilising jars is paramount to the homemade jam process.
The second reason is about helping your homemade jams and pickles last longer. As the sterilising process helps to remove organisms, bacteria and yeast, they’re less likely to grow in your jars and ruin your tasty creations. Thoroughly sterilised jars give your jam the cleanest, most hygienic environment – so you can enjoy your delicious preserves for longer.
Tip
Rather than throwing them away, keeping and repurposing your empty jars and containers is a simple way to reduce household waste. Check out some more tips on living sustainability at home here.
Sterilising jars in the microwave
When learning how to prevent mould on jam, you’re going to want ways that are simple. Sterilising jam jars in microwave ovens is really straightforward and doesn’t take much time at all.
Tip
Remember: you should never place any metallic parts in your microwave, so if you have jars with metal clasps that can’t be removed, you’ll want to try one of the other methods. If your jars are only made of glass, then you can simply carry out the following steps and your jars will be sterilised in a flash:
- Remove any labels from the jar. Try soaking them in hot soapy water first if they’re tricky to remove.
- Use soapy water to make sure that the jar is clean before sterilising. Take care to rinse off all the washing up liquid.
- Place in the microwave (while still wet) and turn on ‘high’ (usually around 1,000 watts) for 30-45 seconds.
- Place them upside-down on a piece of absorbent kitchen paper (like Plenty) to dry off.
Ideally, you could co-ordinate the timing of sterilising your jars with the jam being ready. It’s best to add the freshly made jam to your jars while they’re warm, as cold jars will shatter if you add hot jam to them.
How to sterilise jars in the oven
So, while sterilising jars in the oven takes quite a bit longer than in a microwave, it’s long been known as one of the best methods for sterilising glass jars. You can get the prep done while your jam is simmering and by the time it’s cooked your jars will be ready. Just follow these simple steps:
- Set the oven temperature to 130 C or 270 F – no higher, or you run the risk of the glass breaking.
- Remove the jar labels (by soaking them off, if necessary).
- Wash the jars with soapy water and rinse well. You don’t need to dry them.
- Lay paper in double layers on your oven shelves and arrange the jars whilst wet on the shelves so that they aren’t touching.
- Shut the oven and set a timer for 20 minutes.
- Use an oven glove to remove the jars and stand them on a heatproof mat to cool enough that they’re safe to handle.
A quick word of caution here: never add hot jam to a cold jar or cold jam to a hot jar, as this can lead to cracking or, worse still, a jammy explosion!
Now you know how to sterilise jars in the oven and in the microwave, you’ve got two approaches for sterilising glass jars, but we’ve got a third option up our sleeve – and it’s the simplest one.
How to sterilise jars in the dishwasher
Sterilising jam jars in the dishwasher is probably the easiest method and works really well if you’ve got an extra hot setting on your machine. It’s also the only approach that lets you sterilise the metallic lids in the same way as the glass jars. Sterilising jars for jam making in this way is straightforward with the following steps:
- Make sure the dishwasher is empty and clean.
- Remove any labels from the jars (soaking them off if necessary).
- Carefully place the empty jars and lids into your machine, ensuring they are secure.
- Run the dishwasher on a cycle that coincides with your jam being ready.
- Remove the jars one by one and pat dry using a sheet of Plenty MAX kitchen paper. Plenty MAX removes up to 99.9% of bacteria when wiping with just water, so you can be sure your jam jars will be super clean and sterile when you’ve finished drying them.
- Fill the warm jars with jam and secure with the sterilised lids.
- This works well with screw-top and clip-top jars. With clip-top jars it’s best to remove the rubber to make sure that part gets fully sterilised too. Whilst we’re on the topic of dishwashers, read our handy guide on, so you can have squeaky clean dishes.
How to seal jam jars
While sterilising jars in microwave ovens works really well, you can’t sterilise metallic lids in this way. Instead of using the old lids you can cover the top of the jars with wax or buy new lids to seal your jam. If you’re keen to reuse metallic lids you can use the dishwasher sterilising method or follow our handy hack in the oven section next.
If your jars have rubber seals, then remove them first and boil in water instead of placing them in the oven. It’s best not to dry rubber in hot air. You can also sterilise lids in a saucepan of boiling water for 20 minutes too, while the jars are sterilising in the oven.
Tip
If your jar is tricky to open, add a bit of resistance by placing a strong piece of Plenty kitchen paper over the top of the lid – this should help it twist off more easily.
Now you know how to sterilise jam jars you can take your pick from these three easy ways. If you’re making a big batch and have a lot of jars to sterilise, get everyone in the house involved in a jam production line. There’ll be a safe role for each member of the team, as there are jobs that don’t involve dealing with direct heat. Whether you go for sterilising jam jars in microwave ovens, your kitchen oven or the dishwasher, each method will help ensure that your jam is safe to eat and longer-lasting too.
If you’re after some more helpful and clever cleaning tips, we’ve got something for everyone. From cleaning your cooker head and filter to grandparent approved kitchen towel tips, you’re sure to find something to help you clean up life’s messes. Here’s to a clean and sparkly home.
Sources:
Did you find this article helpful?Thanks for your feedback!
or
Do you have a question on this topic? Contact us
Related articles
How to clean wood burner glass for HD flame-watching
Find out the best way to clean wood burner glass so that it shines. Read about how to clean a wood burning stove and cleaning glass on log burner inserts.

How to clean stainless steel — without streaks, smudges, or scratches
Learn how to clean stainless steel with these easy-to-follow step-by-step instructions, including what cleaning supplies to use when washing stainless steel.

No more streaks: how to clean the windows easily
Cleaning windows can make a real difference to the light in your home. Read on for five easy steps on how to clean windows without streaks.

No more smears! How to clean mirrors without the hassle
What is the best way to clean mirrors? Discover what the best thing to clean mirrors with is, and how to clean mirror glass quickly. Click for more.

How to remove ink stains on wood, plastic, floors & walls
Find out how to remove ink stain marks from a number of different surfaces. Discover pen stain removal techniques for wood, floors and walls.

5 house cleaning tips and printable house cleaning schedule
From unexpected visitors, to parties you forgot you’d planned, learn how to clean your house fast with our 5 house cleaning tips and house cleaning checklist.
